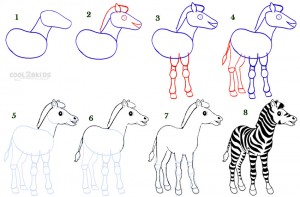
The intricate black and white stripes of a zebra can naturally make it look very difficult to draw one. But in truth, it is not an impossible task as its body structure is quite similar to that of a horse. Follow the below mentioned instructions to easily draw a zebra yourself.
Step 1
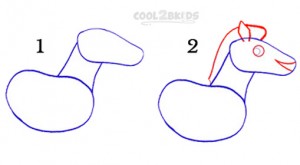
- Start your drawing by making a large bean shape (picture 1). Make it as big as you want your zebra to be as it will later be the body.
- Draw two small, somewhat curvy, almost parallel lines from the right side of the bean (for the neck), followed by a somewhat oval shape (for the head). Keep the wider side of the head attached to the neck (picture 1).
- See picture 2 to draw the mane as well as the only visible eye and ear. Draw a sideways “V” with somewhat curvy sides for the outline of an open mouth.
Step 2
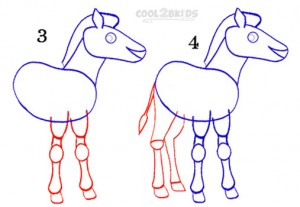
- In this step, you will start working on the legs. Check picture 3 to see how to draw the outlines of the two front legs. Make sure to keep them straight.
- Now, draw the outlines for the hind legs in the similar manner (picture 4).
- Next, draw the tail as shown in the picture.
Step 3
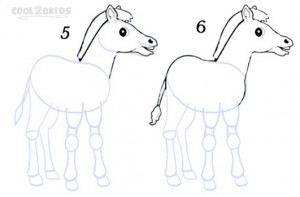
- It is time to start working over the outlines to make your zebra look realistic. Redo the head, mane, eye and ear as shown in picture 5.
- Work on the mouth to add the teeth followed by a single visible nostril.
- See picture 6 to re-draw the upper body and the tail.
Step 4
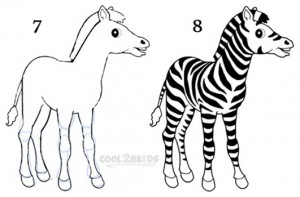
- Carefully work over the outlined legs to make them look more real (picture 7).
- Your basic zebra drawing is done as all that is left to do is erasing any unnecessary lines and drawing the black and white stripes as shown in picture 8.

