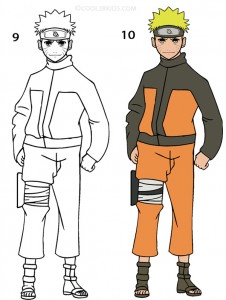
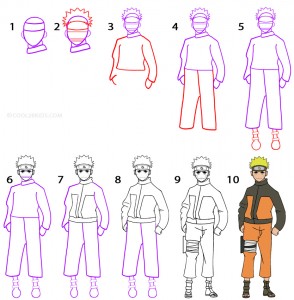
Most popular cartoon characters look so complex that it seems almost impossible to draw a neat picture of any of them. But, the truth is that you can easily achieve a nice drawing if you know where to begin it. Here is a step-by-step picture of Naruto Uzumaki, just follow the steps and you will end up with a perfect picture of your favorite character.
Step 1
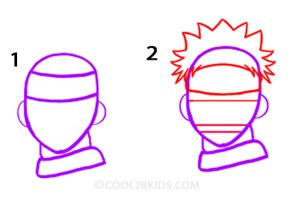
- Begin your drawing by making an oval for your Naruto’s head. Next, draw two small semicircles on both sides of the head (for the ears), followed by a headband and the collar of his shirt as shown in picture 1.
- Now, see picture 2 to draw his characteristic spiky hair and then make two sets of parallel lines to mark the spots for Naruto’s eyes and mouth.
Step 2
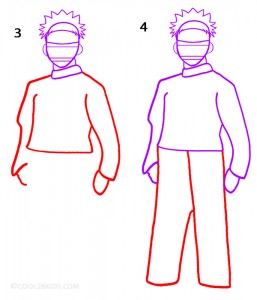
- Now, it is time to start working on the body of your Naruto along with the outlines for the arms and hands as shown in picture 3.
- This is an easy step as all you need to do is draw the outline for the trousers (picture 4).
Step 3
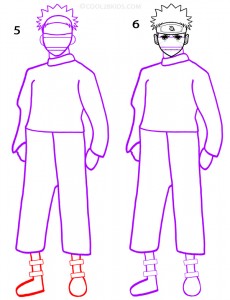
- See picture 5 to draw the outlines for his shoes with the characteristic ridges.
- Once the outlined picture is done, it is time to work on the fine lines to make your drawing perfect. Begin by erasing the top of oval drawn in step 1 as it runs through the hair.
- Next, work on the outlined headband to make it look more like the one worn by Naruto (picture 6).
- See picture 6 to draw his eyes over the two parallel lines marking the area for the eyes. Erase the parallel lines once the eyes are done.
Step 4
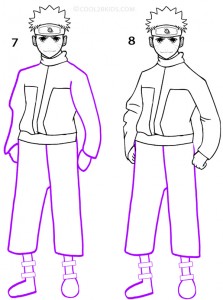
- See picture 7 to draw his mouth over the second set of parallel lines marking their place. Erase the lines once done.
- Now start working on your Naruto’s shirt by making the lines and squares as shown in picture 7.
- Next, see picture 8 to work on the shirt sleeves to make them look more realistic and the upper body is done.
Step 5
- This is the final step of the drawing where you will be working on his trousers and shoes. See picture 9 to draw the folds and creases on the trousers followed by Naruto’s characteristic bandaged gun strap on his right leg.
- Next work on the shoes and draw the feet and fingers to make them look real (Picture 9).
- Your drawing is almost done as all that is left to do is filling the picture with the right shades of orange, grey and yellow (Picture 10).

