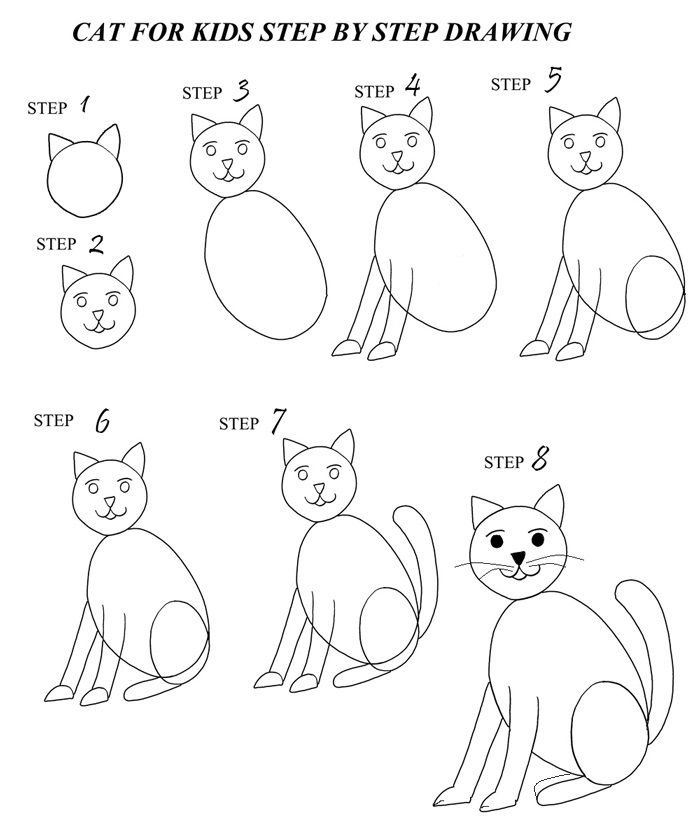
Here is a step by step instruction for beginners (kids age 3-6 years) to learn to draw a simple cat.
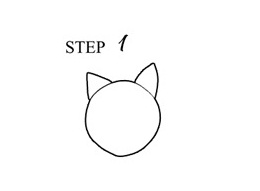
STEP 1
- Begin by drawing a simple circle (this will be the head of your cat).
- Next, draw two triangles with somewhat round sides for your cat’s ears.
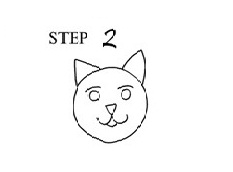
STEP 2
- Start this step by drawing a small triangle upside down in the center of the circle for the nose.
- Then, draw two tiny circles above the triangle like shown in the picture (for the eyes), followed by two small lines above the circles for the eyebrows.
- Now draw two semicircles from the down corner of the triangle, add a little up facing ‘C’ for the mouth, and your cat’s face is complete.
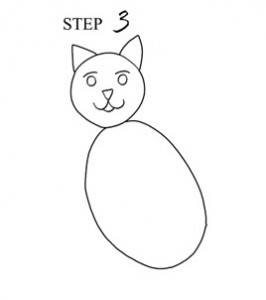
STEP 3
- As you can see in the picture, all you have to do in this step is draw an oval shape just below the head (for the body).
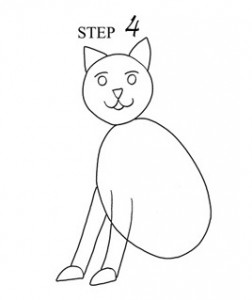
STEP 4
- Now, add four lines to the front of the body (oval). Do not worry too much if the lines are a little curved as they will be the legs of your cat.
- Make two small downward facing ‘D’s for the paws.
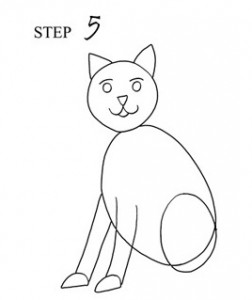
STEP 5
- Now, this step is quite simple consisting only of making a smaller oval shape overlapping the larger one for the thigh.
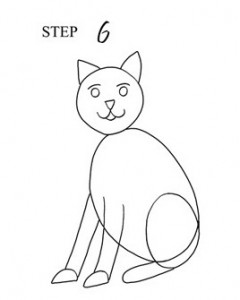
STEP 6
- Just make a sideways ‘U’ from the lower end of the smaller oval for one hind leg, with the loop directing toward the paws (the ‘D’s).
- Now, make a parallel (somewhat lighter) curve above the ‘U’ for the second hind leg.
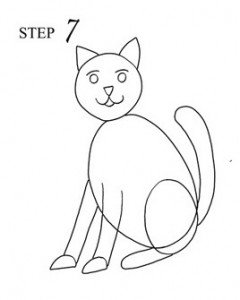
STEP 7
- Here, all you have to do is draw a long, upside down, little curvy ‘U’ (for the tail) from the point where the body and the thigh overlap at the back of your cat’s body.
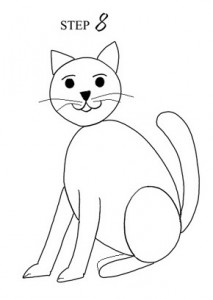
STEP 8
- It is time for the finishing touch as the drawing is almost complete. Make sure to neatly erase all the overlapping lines, such as the ones going through the front leg, thigh and the paws.
- Add a few whiskers below the small triangle representing the nose.
Fill the nose and eyes with a black color pencil or crayon and you are done. Now you can draw a cute cat anytime following these simple steps.

