The lily is a common flower a child comes across almost every day. A drawing tutorial on the pretty blossom could help them learn the basics of drawing any kind of flower.
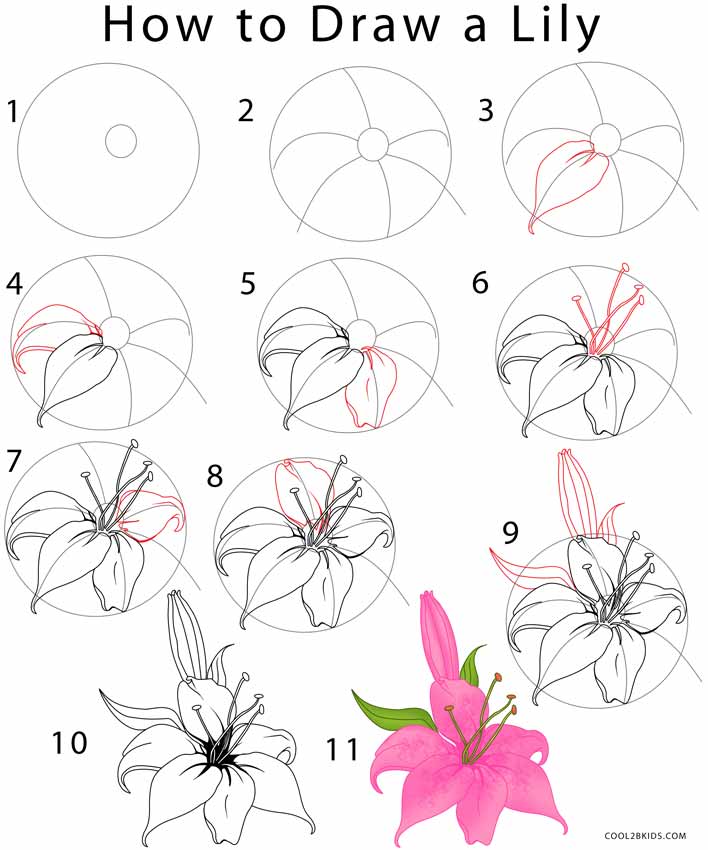
Step 1: Draw a big circle that surrounds a smaller one that is a little shifted to the right from its center.
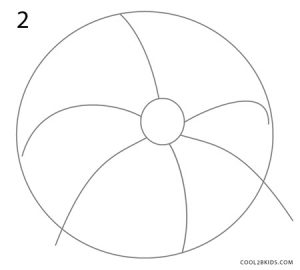
Step 2: Draw three pairs of diagonally opposite curves that act as guides for the petals.
Step 3: Begin with sketching the first petal that resembles the tapering shape of a leaf with a couple of folds at its base.
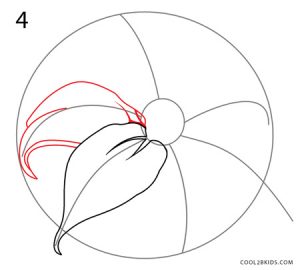
Step 4: Same goes for the second that shows up at a different angle. A double margin at the bottom signifies a fold.
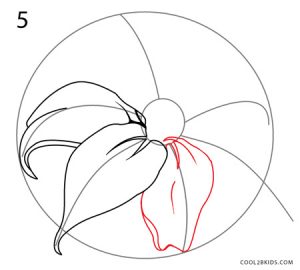
Step 5: The third one is devoid of a pointed end. It just has a couple of curves in that place.
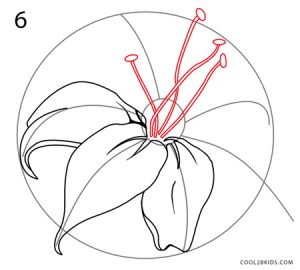
Step 6: Now it’s time to draw four long thin filaments topped with oval anthers. Check how they cross each other.
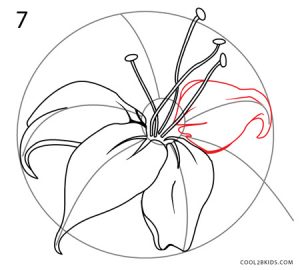
Step 7: The fourth petal resembles the first two in shape and folds but for the orientation and size.
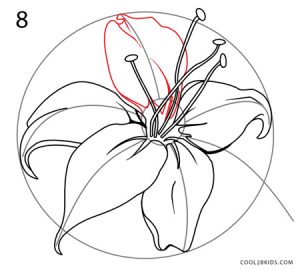
Step 8: The fifth petal complements the structure of the third.
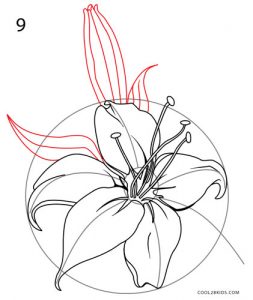
Step 9: Border the flower with an oblong unopened bud on top and slender, curvy leaves at the sides. Note the series of lines running down their bodies.
Step 10: Finish the last petal that looks like a complement of the first though with a little overlapping. Erase guides and make the center prominent.
Step 11: You can give the flower a cute pink color and make the leaves green. The filaments look good in green with pink anthers.
Make the most of an opportunity of not only sharpening your kid’s drawing acumen but also a gain in knowledge on the parts of a flower.

