Have you always found it difficult to teach your kids to draw a neat picture of a squirrel because you yourself don’t know where to start? Drawing a squirrel can be a tricky job, especially for small children. Follow the easy step-by-step instructions given below to draw the perfect squirrel picture.
Step 1
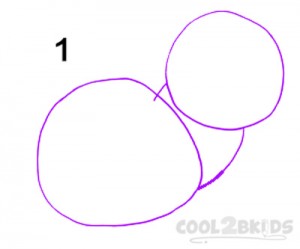
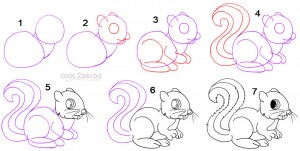
- Begin your drawing with a large circle (it does not have to be too accurate) that would later be your squirrel’s body. Then, draw another smaller circle followed by two curvy lines to join the two circles (picture 1).
Step 2
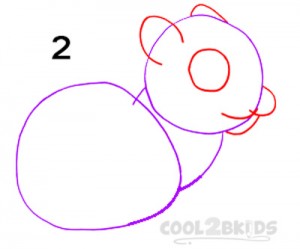
- Here, you will be working on the face to draw rough outlines of the ears, nose, teeth and the only visible eye. See picture 2 to draw them.
Step 3
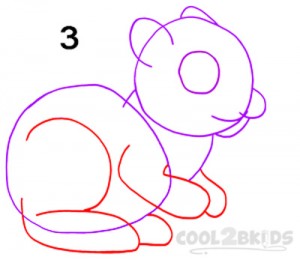
- See picture 3 to draw a few “Cs” and “Us” at specific places to draw the outlines for the legs.
Step 4
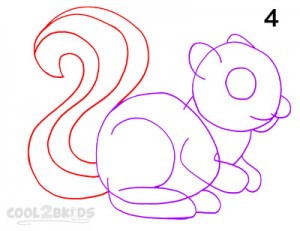
- Now it is time to work on the bushy tail. Check picture 4 to see how to draw a characteristic squirrel tail.
Step 5
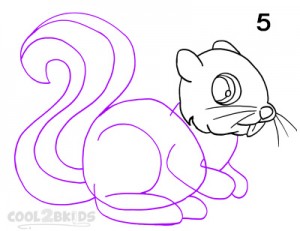
- Once the outlined picture is done, start working on the details. Begin with the head and face as you draw the eye, nose, whiskers and teeth as shown in picture 5.
Step 6
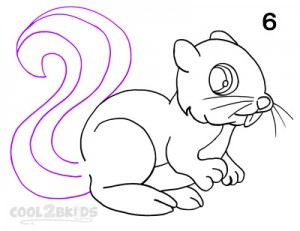
- This step is a bit tricky as you need to draw the details for the back and front sides of the body along with the legs and paws (picture 6). Make sure to erase the rough lines once you are done drawing the body.
Step 7
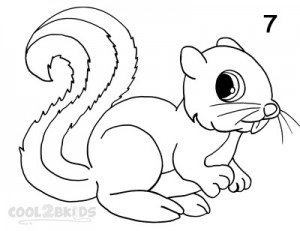
- You have almost completed your drawing as all that are left to work on are the tail and the only eye. Replace the smooth lines of the tail with slightly zigzagged ones so the tail appears bushier and then fill the pupil with black so the eye looks more real.



It helped me draw a squirrel even while rushing.That is something great to follow to draw a squirrel.
VERY NICE STEPS BUT I FEEL LIKE IT IS IMPOSSIBLE TO MAKE IT LOOK FURY AND FLUFFY LIKE THE INSTRUCTIONS SHOW.