It is quite a difficult job to draw a neat picture of an animal or bird. An owl can be one of the most difficult birds to draw, especially with the varying appearances between different species like the barn owl, horned owl and snowy owl. Here is a simple step-by-step drawing of a cute cartoon owl for kids. Just follow the steps and you will be able to draw a nice owl whenever you need to.
Step 1
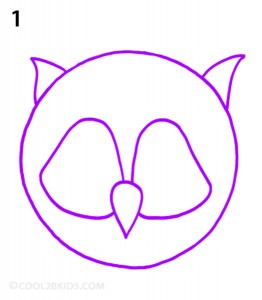
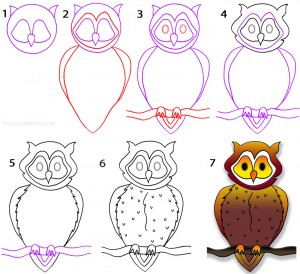
- First, make an accurate circle with a compass for the head of your owl. Next see picture 1 to draw two triangles with curvy sides for the ears followed by a small upside down teardrop shape just below the center of the circle (for the beak).
- Draw two uneven squarish shapes (for the eyes) adjacent to the beak as shown in the first picture.
Step 2
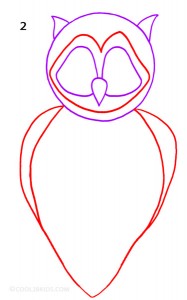
- See picture 2 to draw the large body with double lines near the shoulders.
- Also, draw a line encircling the eyes and the beak as shown in picture 2.
Step 3
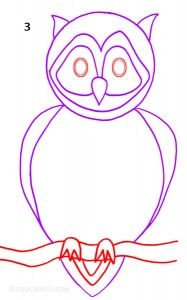
- Begin step 3 by drawing the pupils inside the eyes (picture 3).
- Now, draw a tree branch followed by the talon or claw with which your owl is holding on to the branch.
- Next, see picture 3 to draw two triangular lines at the end of the body to mark the tail.
Step 4
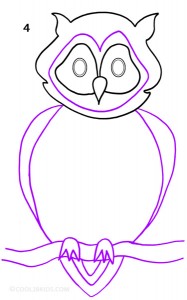
- The outlined picture is done and it is time to work over the outlines to make it look more realistic. Draw over the circle you drew in the first step to make the head fluffier and curvier. Make sure to erase the part of the head cutting through the ears.
Step 5
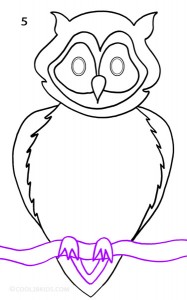
- Now, work over the outlined body to make it look fluffy and feathery (picture 5).
Step 6
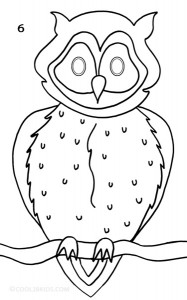
- See picture 6 and make tiny half circles to show the body covered by feathers followed by a curvy line running down the body from the chest area.
Step 7
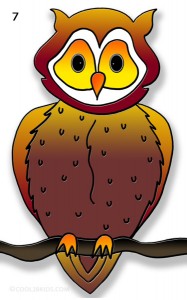
- Fill your owl with catchy colors as shown in picture 7 and your drawing is complete.

