How many times did you fail to cross those fiery obstacles in the last level of the Super Mario video game? Or are you one of those expert players who never fail to rescue the princess from the dragon castle at the end of the day? Either way, you must have sometimes wondered whether it was possible to draw an accurate picture of the adorable character in his red-blue clothes and red hat. So, here is a step-by-step Mario drawing for kids to help you accomplish the job.
Step 1
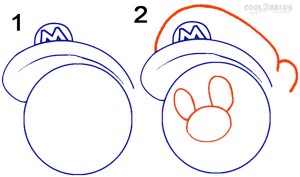
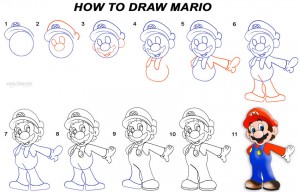
- First, draw a neat circle with a compass (for Mario’s head) followed by the outline for the brim of his hat as shown in picture 1.
- See the picture to draw the circular Mario logo with the capital ‘M’ (the red lines indicate the new steps to follow).
- Now, check picture 2 and draw the basic round outlines for you Mario’s eyes and nose. Then draw the top of his hat.
Step 2
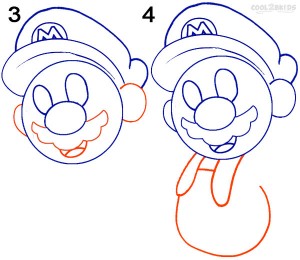
- Draw his characteristic moustache along with his mouth and ears as shown in picture 3
- Picture 4 shows how to draw the outline for Mario’s overalls.
Step 3
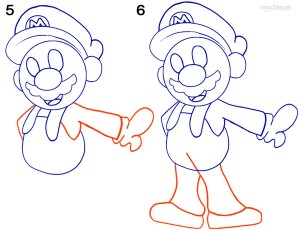
- See picture 5 and draw the outline for the outstretched left arm and gloved hand followed by the partially visible right arm.
- Next, draw the basic structure of his legs and feet (picture 6).
Step 4
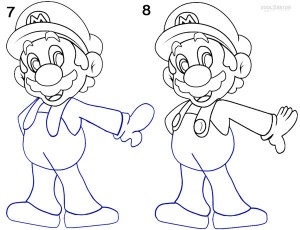
- Now it is time to work over the outlines and add your Mario’s facial details like the eyes, pupils, eyebrows along with his hair.
- See picture 8 to draw the gloved hands with four fingers and a thumb
- Then draw the two large buttons for his overalls.
Step 5
- Carefully erase the lower part of the upper body outline (drawn in step 2) cutting through the legs.
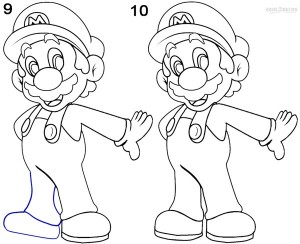
- Now draw the left leg and the shoe as shown in picture 9.
- Next, do the same with the right leg and shoe (picture 10)
Step 6
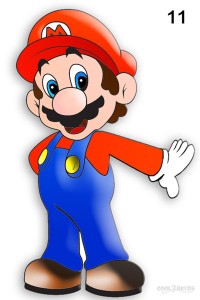
- Your drawing is almost complete except for the coloring part. Fill the picture with the shades shown in picture 11 and see how your Mario comes alive from the pages of your drawing copy.

